← Back to tutorials

Restore an OpenClaw Instance from a Backup

When creating a new OpenClaw instance on MyClaw, you can restore it from a backup.

You do not have to set everything up from scratch. If you already have an OpenClaw backup from MyClaw or your local machine, you can create a new instance with your previous data and settings.

This is especially useful if you were running OpenClaw locally on a Mac mini, personal computer, or server and now want to move it to MyClaw.

How It Works

1

Create a new OpenClaw instance

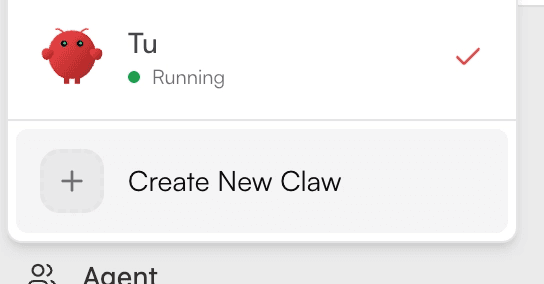
From the Dashboard, choose Create New Claw and select OpenClaw as the instance type.

Create New Claw option in the MyClaw Dashboard
Choose Create New Claw from the Dashboard.
2

Go to the configuration step

Continue through the setup flow until you reach the OpenClaw configuration options.

3

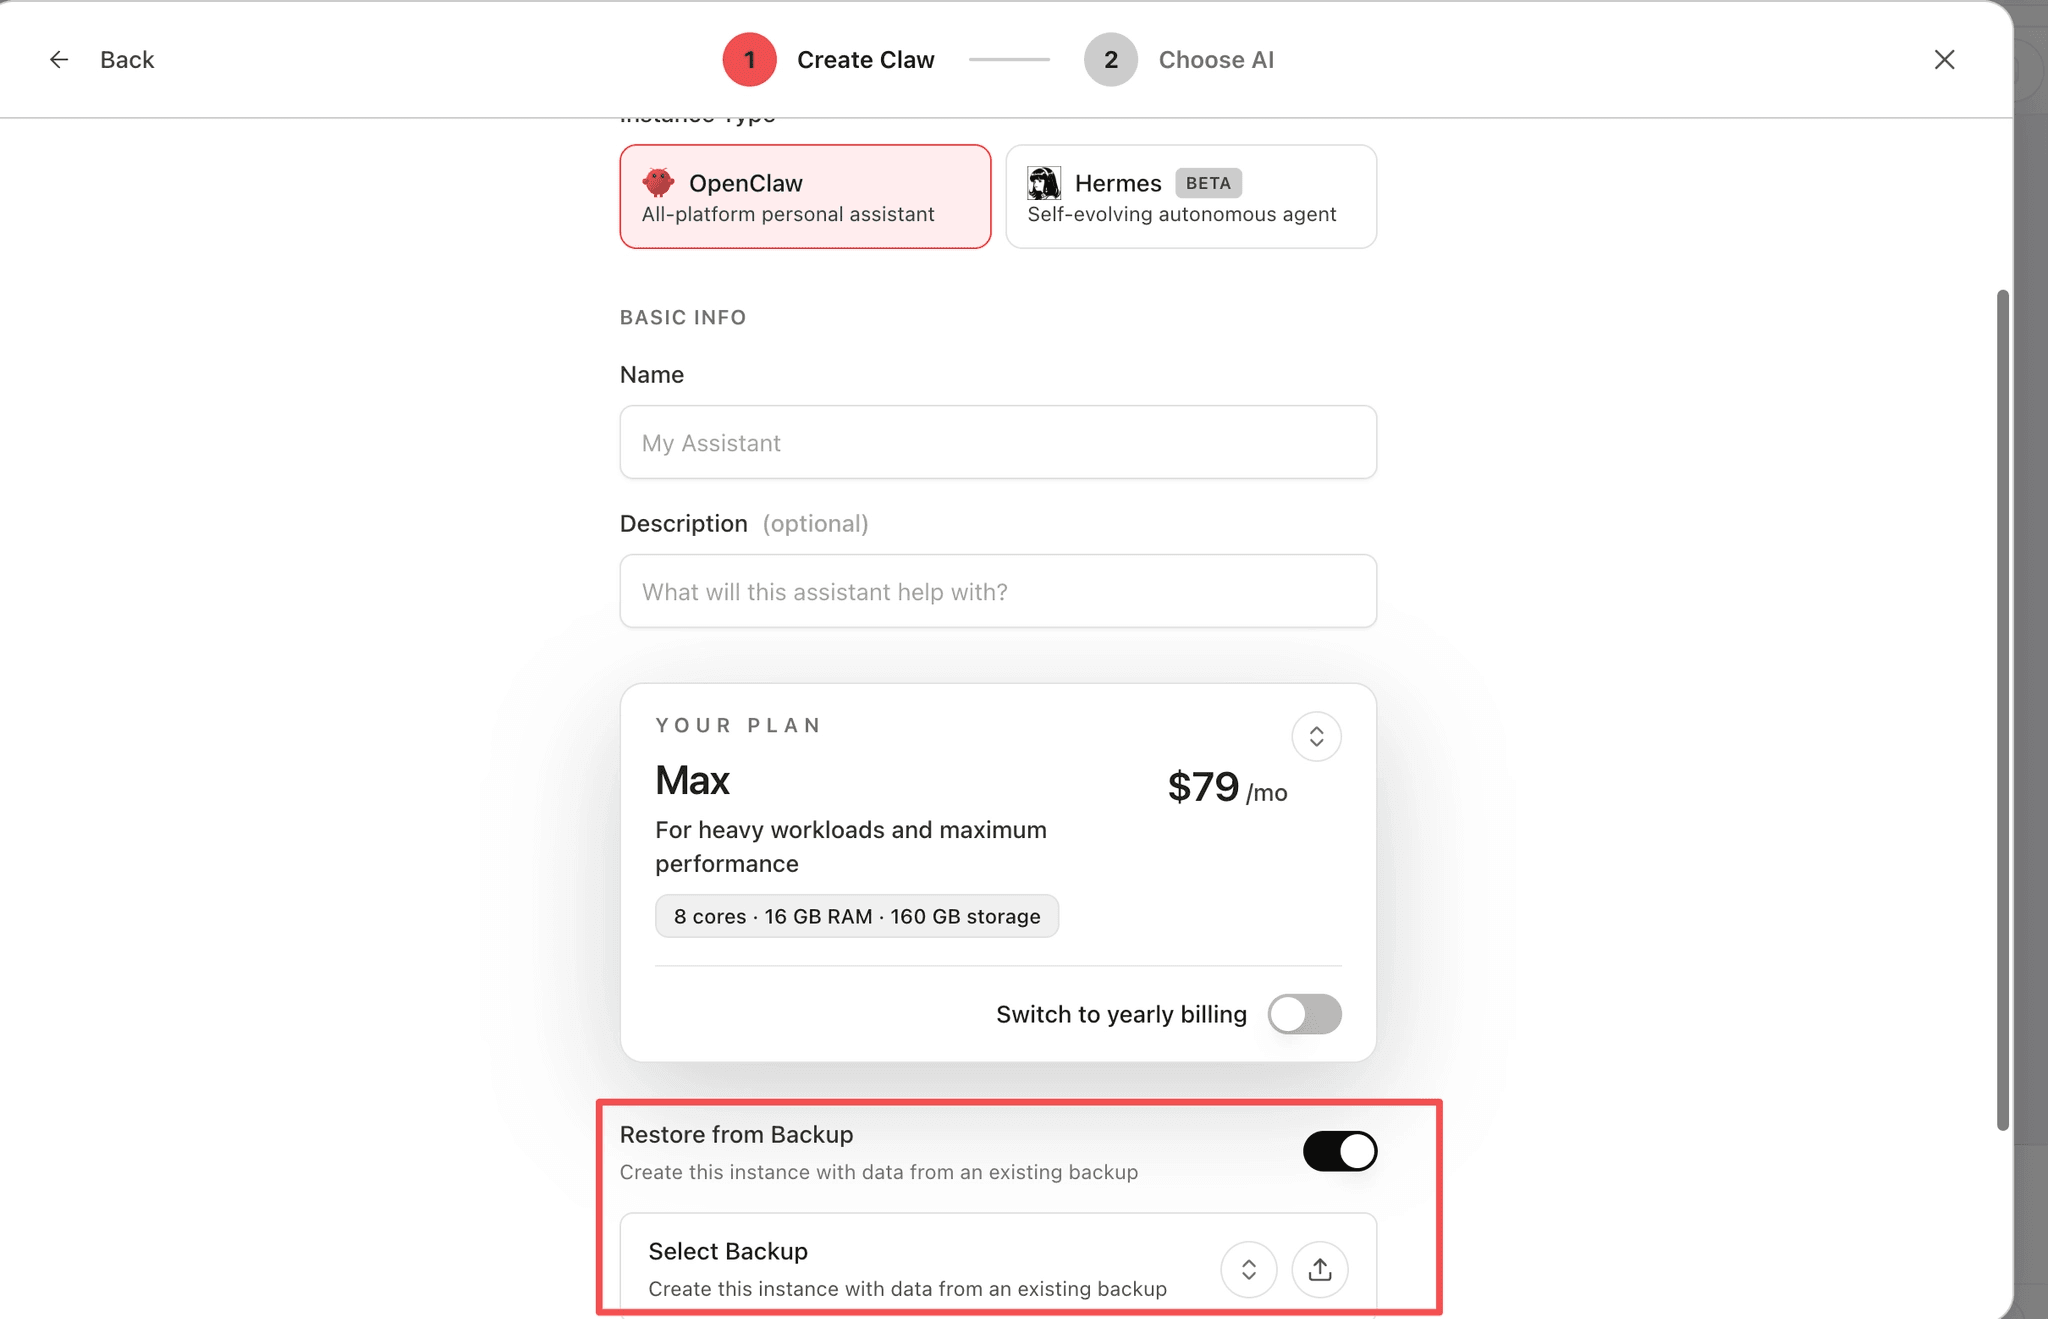
Turn on Restore from Backup

Enable the Restore from Backup switch in the configuration form.

Restore from Backup option in the OpenClaw creation form
Select OpenClaw, then turn on Restore from Backup in the configuration step.
4

Choose a backup source

Select an existing backup from your MyClaw account, or upload a backup file from your computer.

5

Continue creating the instance

Complete the remaining setup and submit the creation form.

Once the instance starts, it will use the data and settings from the selected backup.

Two Ways to Restore

Restore from an Existing MyClaw Backup

If you already have backups in your MyClaw account, choose one directly from the list.

The list shows basic information such as the backup name, time, type, and file size.

A backup may remain available even after its original instance has been deleted. You can still use it to create a new instance.

Upload a Backup File from Your Computer

You can upload a local OpenClaw backup file instead of choosing one from your account.

.tar.gz.zip

Before using the file, MyClaw checks whether it is a valid OpenClaw backup. If validation fails, choose another file.

Upload progress is displayed while the file is being transferred. After upload succeeds, the file becomes the backup source for the new instance.

Maximum file size: 2 GB

Supported Backup Files

MyClaw Backups

These backups are created by MyClaw for your OpenClaw instances and can be selected directly from your account.

Official OpenClaw Backups

If you run OpenClaw locally, create an official backup with this command:

openclaw backup create

The generated file includes a timestamp in its name and usually ends with openclaw-backup.tar.gz. Upload this file when creating your new MyClaw OpenClaw instance.

Common Questions

Will a failed restore stop the instance from being created?

No. If the restore does not succeed, the instance is still created and started as a new OpenClaw instance. You can try restoring again later.

What happens to the file I upload?

The uploaded backup file is only used for this restore process.

Where can I find this option?

Restore from Backup appears in the configuration step when creating a new OpenClaw instance. It is available from both the main instance creation flow and the new instance dialog on the instance list page.

Ready to restore your OpenClaw instance?

Create a new MyClaw instance from your existing backup — your data and settings come with you.

Restore from Backup

MyClaw backups or local .tar.gz/.zip files · Up to 2 GB